On WhatsApp, you can not only exchange text messages but also can make voice and video calls. If you have been using WhatsApp for a while, you might know that the platform allows you to send stickers as well. WhatsApp stickers can be shared with friends and family to make communication more interesting. One can also use Stickers to express themselves in chats. Recently, WhatsApp rolled out a new feature that allows users to create personalized stickers. However, to create personalized stickers, one needs to use the web version of WhatsApp. So, if you are interested in converting any picture to WhatsApp Sticker, you are reading the right guide.
2 Methods to Convert Any Picture into a WhatsApp Sticker
Below, we have shared a step-by-step guide on converting any picture into a WhatsApp Sticker. Let’s check out.
1. Using WhatsApp Web
As mentioned above, the WhatsApp web version now allows you to create your own personalized stickers. Here’s how to use WhatsApp web to convert your picture into a sticker.
First of all, head to the web.whatsapp.com from your favorite web browser.
Now, open the chat window where you want to share your custom sticker.
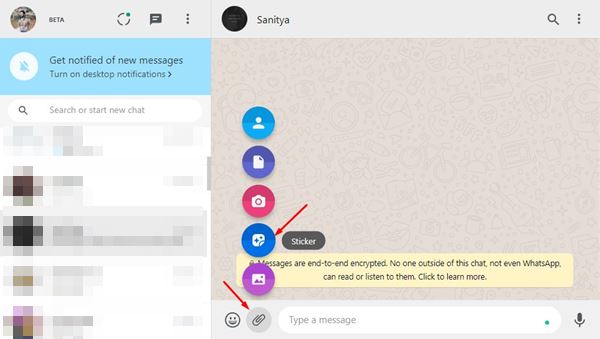
Now click on the attachment button and then on the Stickers.
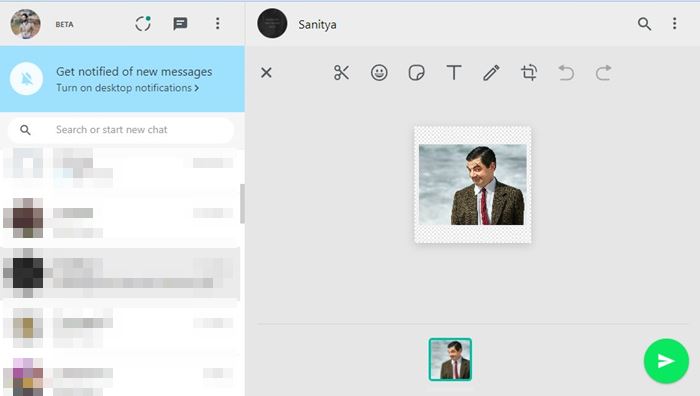
Now, select the photo which you want to convert to a sticker.
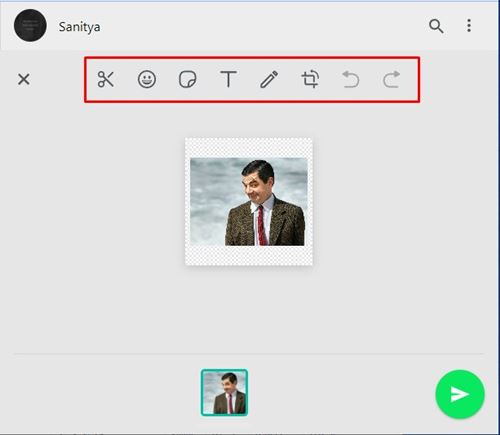
This will open the Sticker maker UI. You can now make changes to the sticker like you can cut/crop images, add texts, rotate images, draw over images, etc.
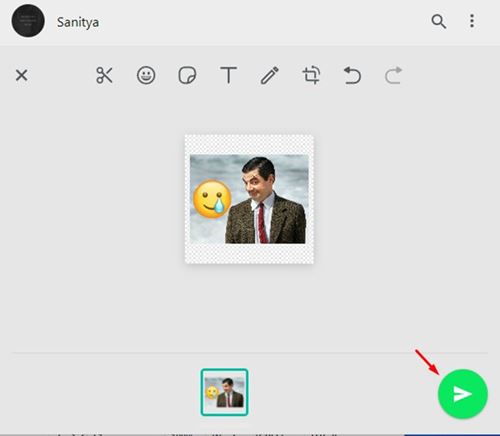
Once done with the changes, click on the Send button.
That’s it! Your custom sticker will be sent to the chat.
2. Using Sticker Maker App
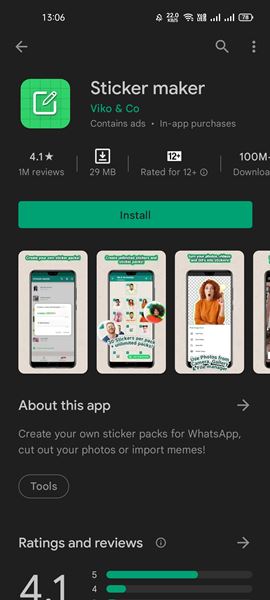
Well, if you don’t want to rely on the WhatsApp web version to create WhatsApp Sticker, you need to use the Sticker Maker app for Android. Here’s how to use the app.
First of all, download & install the Sticker Maker app on your Android smartphone.
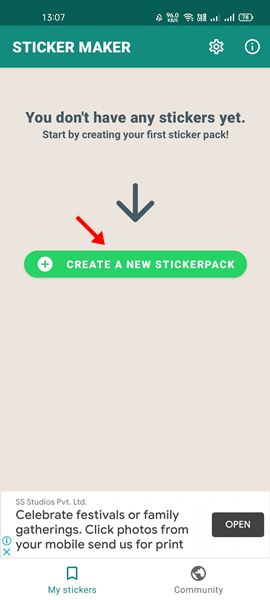
Once installed, open the app and tap on the Create a new Stickerpack button.
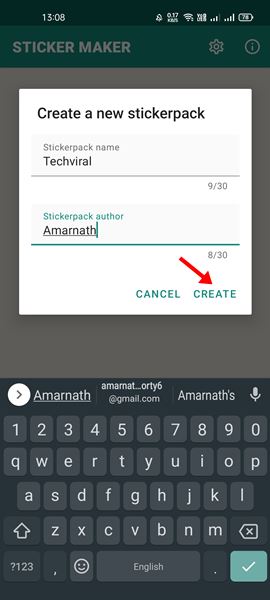
Now, you will be asked to enter the name of the sticker pack. Assign a name and author name and tap on the Create button.
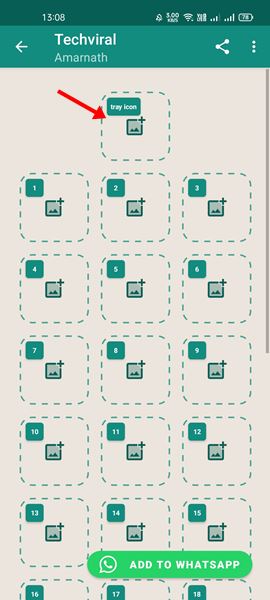
Next, tap on the tray icon and select the image you want to convert into a sticker.
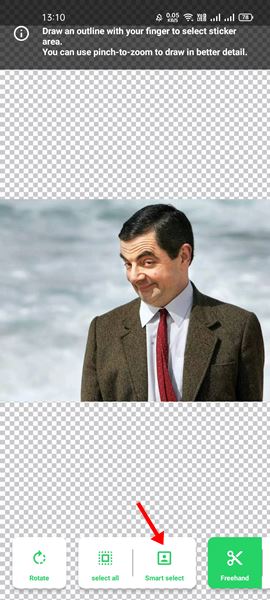
Use the Smart select option to cut the subject from the photo automatically. You can select the Freehand option to pick the subject manually.
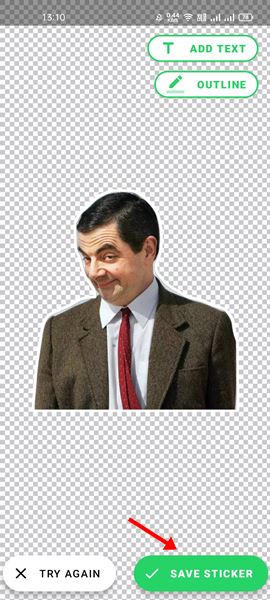
Once done, you can add text to your sticker. Once done with the editing, tap on the Save Sticker option.
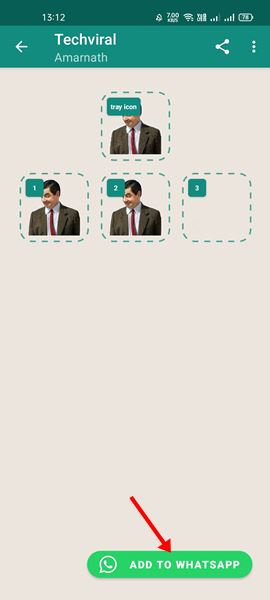
The sticker will be saved on the sticker pack. You need to add at least three stickers to the pack to publish it on WhatsApp.
Once done, tap on the Add to WhatsApp button as shown below.
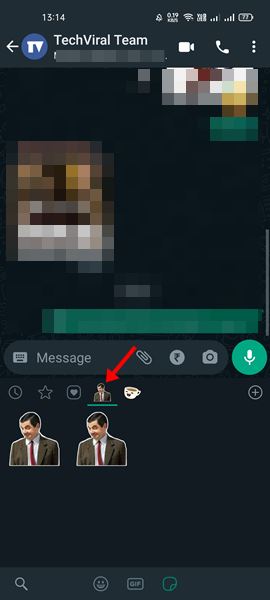
Now, open the WhatsApp chat window where you want to share the sticker. Next, switch to the Sticker tab, and you will find your sticker there.
That’s it! You are done. This is how you can use Sticker Maker to convert pictures into WhatsApp stickers. You can create as many stickers as you want for your WhatsApp account with these two methods. WhatsApp doesn’t put any limit on creating and sharing stickers on its platform. I hope this article helped you! Please share it with your friends also. If you have any doubts related to this, let us know in the comment box below.
Δ

